To implement a taxonomy filter for your WordPress project, follow these steps:
- Define your taxonomy: First, create the taxonomies you want to filter by. You can do this by adding the appropriate code in your theme’s
functions.phpfile or in a custom plugin. For example, let’s say you want to create two taxonomies: “Type” and “Author”. You can use theregister_taxonomy()function to define them. Here’s an example:
function create_custom_taxonomies() {
    // Taxonomy for Type
    $type_args = array(
        'labels' => array(
            'name' => 'Type',
            'singular_name' => 'Type',
        ),
        'public' => true,
        'hierarchical' => true,
    );
    register_taxonomy('type', 'your_custom_post_type', $type_args);

    // Taxonomy for Author
    $author_args = array(
        'labels' => array(
            'name' => 'Author',
            'singular_name' => 'Author',
        ),
        'public' => true,
        'hierarchical' => true,
    );
    register_taxonomy('author', 'your_custom_post_type', $author_args);
}
add_action('init', 'create_custom_taxonomies');
Make sure to replace 'your_custom_post_type' with the actual name of your custom post type.
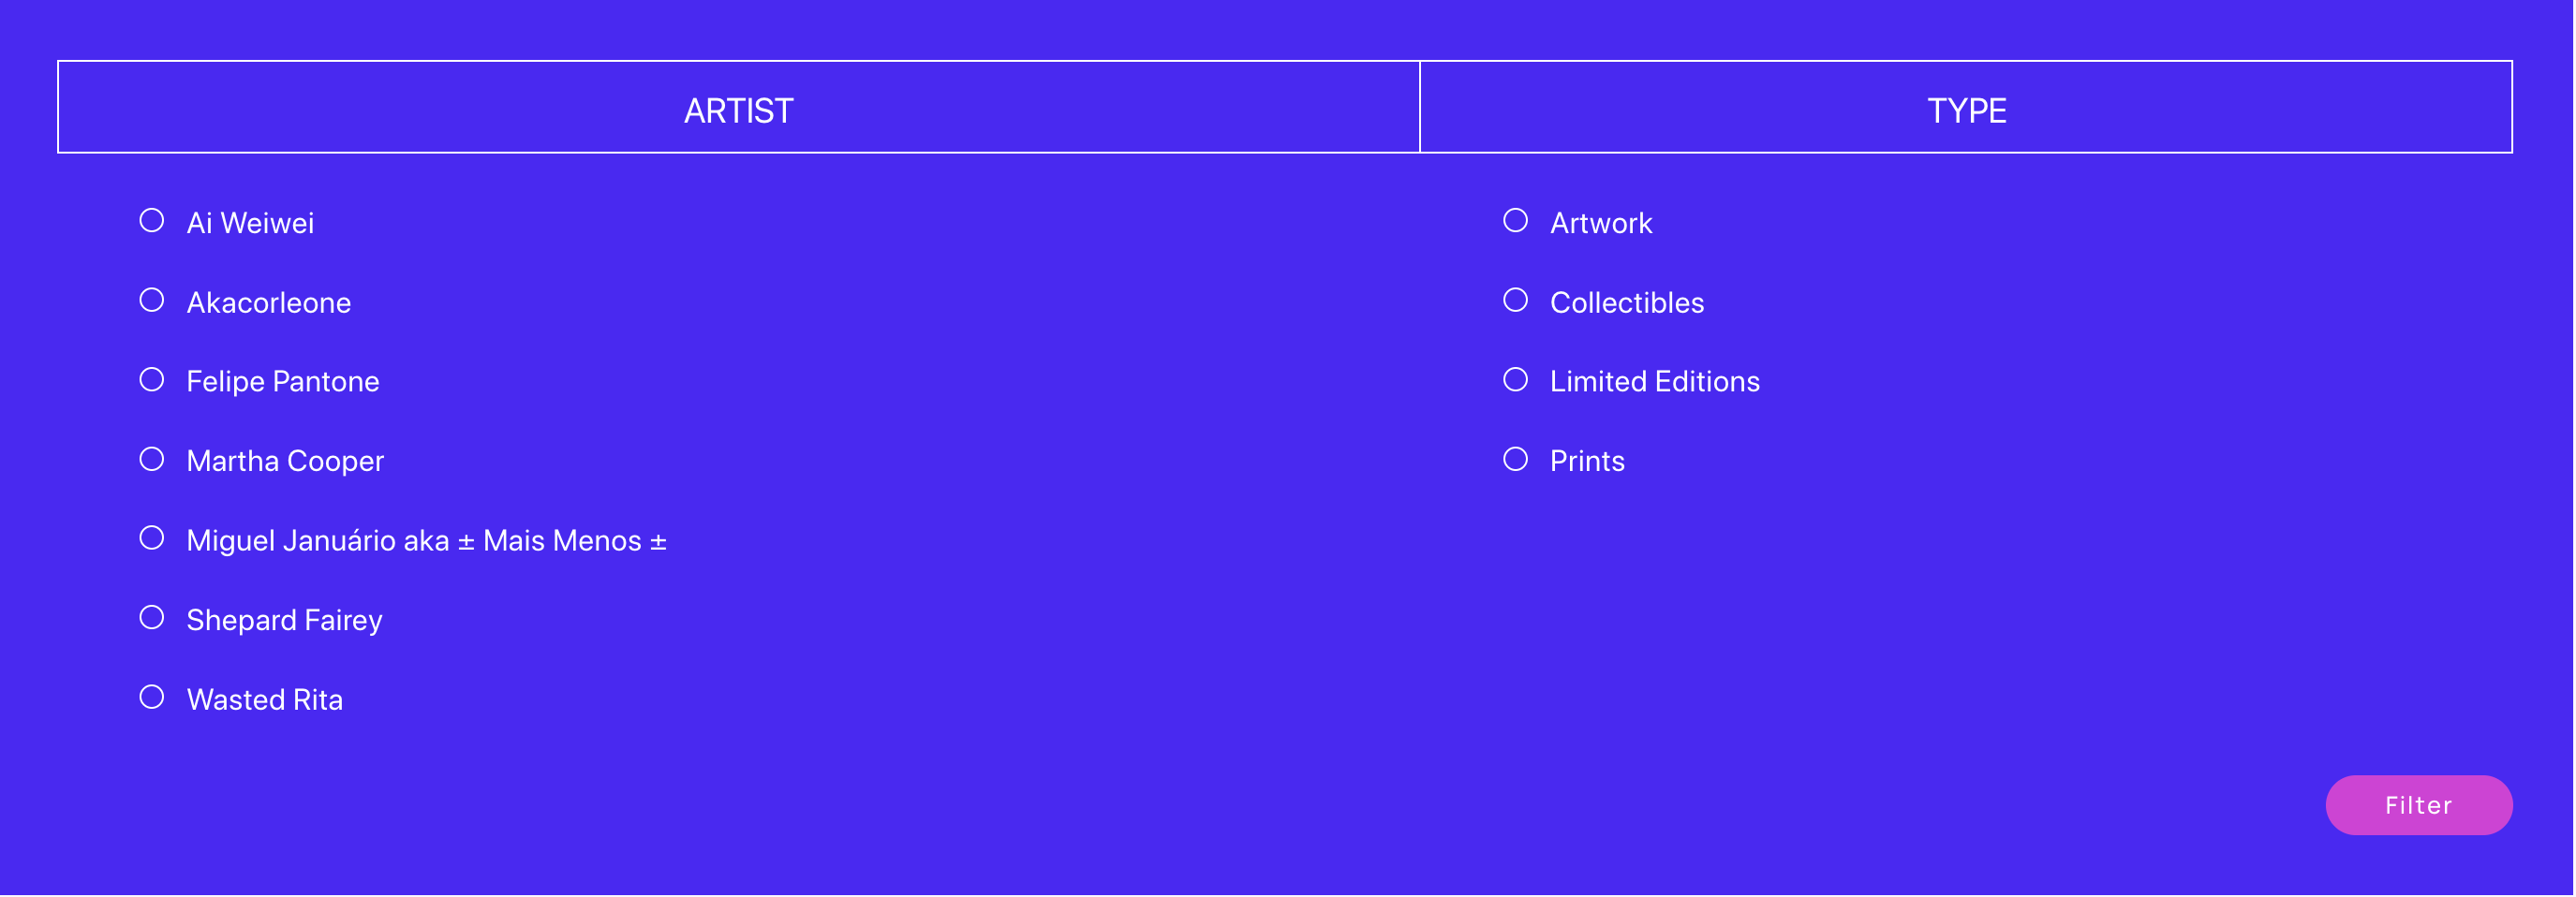
- Display the taxonomy filter form: Next, you need to display the filter form in your desired location, such as on a page or within a widget. You can use the code you provided as a starting point and modify it to fit your needs. Here’s an example of how the modified code could look like:
<form method="GET">
    <div class="portfolio-filter-row">
        <div class="portfolio-filter-column">
            <div class="portfolio-filter-head">
                <h3>Artist</h3>
            </div>
            <?php
            $artists = get_terms(array('taxonomy' => 'author', 'hide_empty' => true));
            foreach ($artists as $artist) {
                echo '<div class="filter-item"><label><input type="checkbox" name="tax_name_artist[]" value="' . esc_attr($artist->term_id) . '">' . esc_html($artist->name) . '</label></div>';
            }
            ?>
        </div>
        <div class="portfolio-filter-column">
            <div class="portfolio-filter-head">
                <h3>Type</h3>
            </div>
            <?php
            $types = get_terms(array('taxonomy' => 'type', 'hide_empty' => true));
            foreach ($types as $type) {
                echo '<div class="filter-item"><label><input type="checkbox" name="tax_name_type[]" value="' . esc_attr($type->term_id) . '">' . esc_html($type->name) . '</label></div>';
            }
            ?>
        </div>
    </div>
    <input type="submit" value="Filter" class="filter-button">
</form>
This code retrieves the terms from the taxonomies using the get_terms() function and then displays them as checkboxes in the form.
- Handling the filter results: Once the form is submitted, you can retrieve the selected taxonomy terms and use them to filter your content. You can modify your existing query or create a new query based on the selected terms. Here’s an example of how you can modify the query to filter by the selected terms:
$type_filter = isset($_GET['tax_name_type']) ? $_GET['tax_name_type'] : array();
$author_filter = isset($_GET['tax_name_artist']) ? $_GET['tax_name_artist'] : array();

$args = array(
    'post_type' => 'your_custom_post_type',
    'tax_query' => array(
        'relation' => 'AND',
        array(
            'taxonomy' => 'type',
            'field' => 'term_id',
            'terms' => $type_filter,
        ),
        array(
            'taxonomy' => 'author',
            'field' => 'term_id',
            'terms' => $author_filter,
        ),
    ),
);

$query = new WP_Query($args);
In this code, we retrieve the selected terms from the $_GET superglobal and use them in the tax_query parameter of the WP_Query class.
That’s it! You’ve successfully implemented a taxonomy filter for your WordPress project. Customize the code according to your specific needs and make sure to replace 'your_custom_post_type' with your actual custom post type name.